Well... perhaps it is time to do a updated video of my 2 to 1 Termignoni system. I did it once before and it was before I wrap the headers and open the belt cover. You guys notice any different?
Sunday, February 13, 2011
Sunday, February 6, 2011
Custom belt Cover 2 - updated look

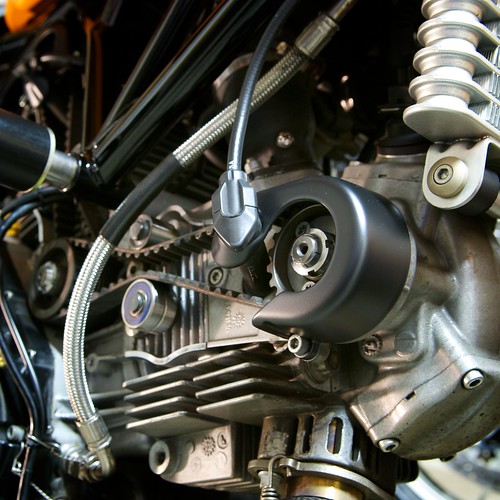
So...here is how my baby looks now - very different if you ask me. It looks and feels raw; but yet it still shows the details and effort. Can't wait to fire her up!
Custom belt Cover - a cheap way
We still in a fairly tough time in general, and I am not ready to drop over $300 for a set of Speedymoto belt covers - they are nicely made; but seriously, the design is a bit 'dry'. So maybe there is something I can do by using the existing parts. Here is the end product of good 2 hrs work - not bad at all especially after wet sanded and spray painted.
For any one who want to create his/her own unique design without robbing a bank; here is a list of tool and material you need:
- Rotary tool, I have Demeral 4000 with accessories kit
- A work station, or something to hold the rotary tool
- Sand paper from 100 to 800 (wet sand)
- Spray paint: Primer and any color you want
BTW, make sure you know that you are doing it at your own risk. There is endless discussion out there about the good and bad of open belt covers - I personally care less of that's other said. The bottom line is it's your own bike, and you can do what-ever you like on it as long as it is legal. If you still with me, read on...
So, first off, come up with a design - make sure you know and clear about what to cut and what to keep. Once you make up your mind you can start cutting. For plastic, higher RPM of the rotary tool and new cut bit are recommended. Make sure you have enough work surface to move the cover freely. The actual cut time is relatively short if you know what you are doing. Rotary tool is very easy to use but you should always rear a nice pair of safety glasses. Once separate your design from the stock cover, it's time to sand it down and smooth all the rough edges. Work from #100 sand paper all the way up to #400, and make sure everything clean, smooth, and nice. Since I am going to use matt black as the final finish; there is no reason to go any higher than #400 sand paper. But if you want thing reflective, #800 wet sand is a must. after cleaning the parts, they are ready for primer. Two layers of primers and minimum two layers of finish paint are recommended. Allow at least 1 hour to dry for each layer of paint, and make sure you wet sand (#400 sand paper) between layers.
So there you go - it is a very simple weekend project. I hope you enjoy it as much as me =)
Subscribe to:
Posts (Atom)

