
A $5 decal makes the Clutch looks much better! I never be a big decal guy but this surely a great success!
Monday, June 13, 2011

Saturday, May 21, 2011
Ducati 'CLUTCH' Helmet
New addition to my helmet 'collection' - this is my first AGV/Ducati helmet! Compare to both of my Aria and Shoie; the AGV/Ducati is much lighter. This is not exactly a top-end model; but somehow it fits my head much better especially around my ears compare to the GP-Tech or T2. It looks nice from a distance; but for sure missing nice paint details like X-11/X-12. Well, for $399, I guess I can't ask for too much. Will see how it performs... stay tune for review!


Saturday, May 14, 2011
Keira Knightley and Ducati 750 Sport
Friday, May 6, 2011
Dainese Avro One Piece Suit
Finally it arrives after 2 weeks of wait!!! My old Dainese Laguna Seca Pro suffers small surface damages from my last crash, and it's not to the point where I can't wear it anymore; but what the hell - let's leave it for my track day. After looking around a bit I decided to go with Dainese once again - it's pricey; but it's really well build and fits me well. Within the Dinese line; 3 suits fit me well within my budget - Red line, Laguna Seca Pro, and Avro... so end up I picked the Avro. BTW, big thanks to D-Store in San Francisco helping me to pick a right one. Avro is the most comfortable one. It fit better than Laguna Seca Pro, and much much better than Red line - really can't used to the "bib design". So far I like it a lot; but it's not prefect - sleeves are about .5" too long for me. For your reference, it's size 38/48, and I am 5'-8" and weighted 153lb (lost about 10lb since last suit - down sized from 40/50!!!). It has enough room for under suit and full size Dainese back protector.
Can't wait for a ride tomorrow with my new suit!

Can't wait for a ride tomorrow with my new suit!
Friday, April 22, 2011
18K mile service
It's time! 18K happy mile for my Sport Classic - I consider it is a achievement. The service includes replace timing belts, air filter, oil filter, flashing all fluid, and checking valve clearance. I have them to replace the clutch plates and basket for me too - after 18000 mile of hard launches and engine brake, it's time for replacement. She will have the newly coated tank #3 too - this going to be pretty major service for her. As usual, she is in trusted hands of Ace Motosports once again. Can't wait to bring her home tomorrow.


Sunday, April 3, 2011
Beautiful Spring ride
After weeks of rain, finally the sun is up once again. This was the first ride after my accident, and I re-visited the crash site... Feeling a bit sad seeing a piece of fairing lying on the side of the road... but at least that wasn't my dead body.
It was a great ride! I was there early enough there wasn't much of a traffic, and the roads were dry and clean - feel like I am walking away the shadow of my accident and ready once again for the riding season =)

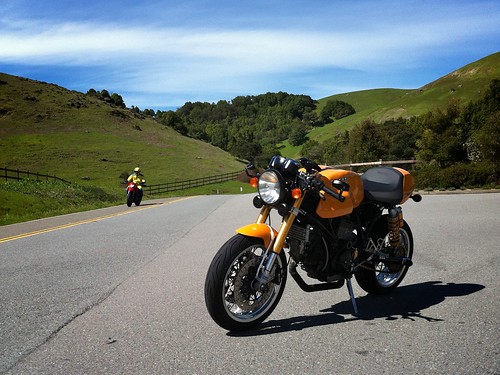
It was a great ride! I was there early enough there wasn't much of a traffic, and the roads were dry and clean - feel like I am walking away the shadow of my accident and ready once again for the riding season =)
Sunday, March 13, 2011
Tank #3 with coating
 |
| New tank - so smooth, so beautiful |
 |
| Dual layer 3M coating at fuel pump area |
 |
| View from fuel pump toward gas cap area |
This is the first time I have have chance to inspect what kind of work been done. The tank as dual layer of 3M silver metallic color coating, and it acts as a barrier between the plastic tank and gasoline. $235 with life time warranty - not too bad. Before the deer killed my Streetfighter, the coated tank was working perfectly fine. I will have Ace Motosports to do the installation along with the new clutch. I will post update soon. Stay tune.
Sunday, March 6, 2011
Deer vs Streetfighter... and no one wins
Yip, that's me 'resting' in the middle of the road with a dead deer in front of me. Still remember first thing came to my mind after the impact was "shit, my wife going to be pissed!!!"
I guess I will ride my Classic a lot more for the next few months. Will bring update on the insurance process and out-come on my SF-S blog. Here is the link of details... and yes, I am one lucky dog.

I guess I will ride my Classic a lot more for the next few months. Will bring update on the insurance process and out-come on my SF-S blog. Here is the link of details... and yes, I am one lucky dog.
Sunday, February 13, 2011
The Sound of Termignoni Full System
Well... perhaps it is time to do a updated video of my 2 to 1 Termignoni system. I did it once before and it was before I wrap the headers and open the belt cover. You guys notice any different?
Sunday, February 6, 2011
Custom belt Cover 2 - updated look

So...here is how my baby looks now - very different if you ask me. It looks and feels raw; but yet it still shows the details and effort. Can't wait to fire her up!
Custom belt Cover - a cheap way
We still in a fairly tough time in general, and I am not ready to drop over $300 for a set of Speedymoto belt covers - they are nicely made; but seriously, the design is a bit 'dry'. So maybe there is something I can do by using the existing parts. Here is the end product of good 2 hrs work - not bad at all especially after wet sanded and spray painted.
For any one who want to create his/her own unique design without robbing a bank; here is a list of tool and material you need:
- Rotary tool, I have Demeral 4000 with accessories kit
- A work station, or something to hold the rotary tool
- Sand paper from 100 to 800 (wet sand)
- Spray paint: Primer and any color you want
BTW, make sure you know that you are doing it at your own risk. There is endless discussion out there about the good and bad of open belt covers - I personally care less of that's other said. The bottom line is it's your own bike, and you can do what-ever you like on it as long as it is legal. If you still with me, read on...
So, first off, come up with a design - make sure you know and clear about what to cut and what to keep. Once you make up your mind you can start cutting. For plastic, higher RPM of the rotary tool and new cut bit are recommended. Make sure you have enough work surface to move the cover freely. The actual cut time is relatively short if you know what you are doing. Rotary tool is very easy to use but you should always rear a nice pair of safety glasses. Once separate your design from the stock cover, it's time to sand it down and smooth all the rough edges. Work from #100 sand paper all the way up to #400, and make sure everything clean, smooth, and nice. Since I am going to use matt black as the final finish; there is no reason to go any higher than #400 sand paper. But if you want thing reflective, #800 wet sand is a must. after cleaning the parts, they are ready for primer. Two layers of primers and minimum two layers of finish paint are recommended. Allow at least 1 hour to dry for each layer of paint, and make sure you wet sand (#400 sand paper) between layers.
So there you go - it is a very simple weekend project. I hope you enjoy it as much as me =)


For any one who want to create his/her own unique design without robbing a bank; here is a list of tool and material you need:
- Rotary tool, I have Demeral 4000 with accessories kit
- A work station, or something to hold the rotary tool
- Sand paper from 100 to 800 (wet sand)
- Spray paint: Primer and any color you want
BTW, make sure you know that you are doing it at your own risk. There is endless discussion out there about the good and bad of open belt covers - I personally care less of that's other said. The bottom line is it's your own bike, and you can do what-ever you like on it as long as it is legal. If you still with me, read on...
So, first off, come up with a design - make sure you know and clear about what to cut and what to keep. Once you make up your mind you can start cutting. For plastic, higher RPM of the rotary tool and new cut bit are recommended. Make sure you have enough work surface to move the cover freely. The actual cut time is relatively short if you know what you are doing. Rotary tool is very easy to use but you should always rear a nice pair of safety glasses. Once separate your design from the stock cover, it's time to sand it down and smooth all the rough edges. Work from #100 sand paper all the way up to #400, and make sure everything clean, smooth, and nice. Since I am going to use matt black as the final finish; there is no reason to go any higher than #400 sand paper. But if you want thing reflective, #800 wet sand is a must. after cleaning the parts, they are ready for primer. Two layers of primers and minimum two layers of finish paint are recommended. Allow at least 1 hour to dry for each layer of paint, and make sure you wet sand (#400 sand paper) between layers.
So there you go - it is a very simple weekend project. I hope you enjoy it as much as me =)
Thursday, January 6, 2011
First solo run of 2011!
Finally have the time and right weather to ride - my very first ride of 2011! The weather was unseasonably dry and warm... I guess that means more ride for me =)
Happy new year everyone!


Happy new year everyone!
Sunday, December 26, 2010
Foggy Christmas solo run

Somehow managed to take a quick spin before the Christmas family gathering. It had been raining hard and the roads were still a bit wet with gravel everywhere especially around the hilly areas. End up I did a average 40MPH run - I think I broke my personal slowest record on the same route. Not bad actually - just wanted to enjoy the peaceful foggy morning ride, stayed up-right, and came home in one piece. It is Christmas after all...
Hope you guys have a wonderful Christmas and New Year!!! Cheers!!! =)
Friday, November 26, 2010
A very cold Thanks Giving day solo run
Thanks Giving dinner didn't start until 6pm - so I had a few hours for a quick solo ride. The only problem was the weather - it was way too cold. At 10am, under the sun felt like 43F (6C); and once under shade it was like down to 38 (3C)! When I was out there, 80% of the roads were actually dry and clean; but if there is any wet spot, I needed to be super careful since it could have 'black ice'. The trip still turned out nicely without any problem and the cold weather was perfect for testing out my new winder gear. I got the heated inner layer under the new Dainese D-dry suit, and Under Armour Coldgear undersuit. Thanks to the heated layer; my body was toasty warm even at 80mph. The only problem was my hands - so cold that I can't even feel my fingers. I guess it is time to look into winter groves...


Sunday, November 21, 2010
Finally meet the new Ducati Diavel!
So I finally meet the new Diavel at the International Motorcycle Show! It was one muscle bike! Fat rear tire, strong engine... There were a lot of nice details, like the hidden passenger pegs and handle bar, split radiators, and very cool wheel hub mounted license plate holder. But seriously, the proportion of the motorcycle was all wrong - at least to me. The bar was way too high, tank was too long, and pegs were too forward. Felt like riding a pig LOL. Will see how it turns out once it hits the road.


Monday, November 8, 2010
Dainese Fulcrum boots
Finally I have some serious winter riding gears! The Dainese Fulcrum boots are light, warm, water and wind proof and yet still breathable. Somehow it runs one size bigger (I used to wear size 43; but it fits me well at 42). The only complain that I have is at the end of the toe area seems to be too roomy - so my toes vibrate inside the boots a bit - and I felt a bit tied after a long ride. It is not really big deal since I can always add a pair of thin shoes pad or thicker socks to make it fits better. So far after 400 miles trip mix with wet and dry weather, it seems holding up really well.... I highly recommend it!
BTW, I got this boots at 40% off at Hattar Motorsports annual sale... Thanks Hattar!


BTW, I got this boots at 40% off at Hattar Motorsports annual sale... Thanks Hattar!
Sunday, October 31, 2010
Dainese D-dry winter suit with Dainese Fulcrum boots
So this is the first time I ever wear a full non-leather suit - it actually not as bad as I thought. All the leather jackets and suit that I have are for summer use. I do, in fact, have a very good under suit to regulate my body temperature; but it can only do so much, especially under high amount of air flow and wet weather during the ride. Hopefully D-dry system will be the answer - something that about to withstand wind and rain, offers protections, not too loose in cutting, and most important of all, it has to look good!
I got a new pair of all season boots too - the Dainese Fulcrum boots. It is not as nice looking as other top of the line racing boots; but for sure it is the most comfortable pair of boots I ever own. Full soft leather with protection and Gore-tex liner insider for water proofing, and fit really well with the Pro-dry pants (P Sherman Pro-Dry). The only concern is the pants is not as 'sticky' as leather.... Will post review later after the first ride - stay tunes!


I got a new pair of all season boots too - the Dainese Fulcrum boots. It is not as nice looking as other top of the line racing boots; but for sure it is the most comfortable pair of boots I ever own. Full soft leather with protection and Gore-tex liner insider for water proofing, and fit really well with the Pro-dry pants (P Sherman Pro-Dry). The only concern is the pants is not as 'sticky' as leather.... Will post review later after the first ride - stay tunes!
Monday, October 18, 2010
Workday get-away - Pinehurst Road
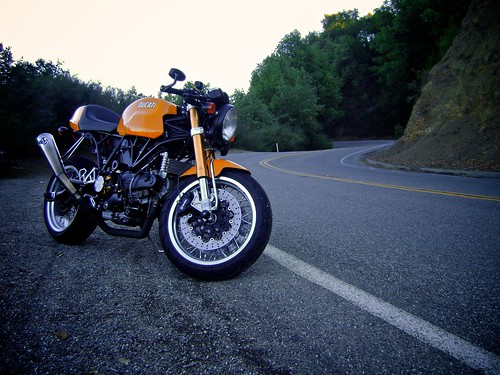
I have been on Pinehurt many many times - I consider it is my 'extended backyard'. It is a B grad road - narrow, shady, and full of turns. It is not exactly a technical road; but most of the turns are blind curves and very tight, and rock and gravel always hide behind turns to surprise riders. It is still manageable for road bike - but I would stay away from it after a big storm... Regardless of road condition, a quick run on Pinehurst always put a big smile on my face =)

Sunday, October 3, 2010
Sunday solo run
 |
| Right above the lake! |
 |
| Just to be fair - I took this photo at the exact same spot as my Streetfighter! |
 |
| Hairpin turn at Lake Hennessy |
 |
| Another angle... |
 |
| Lunch at Gott's Roadside... Ahi Burger!!! |
The only thing pull me back a bit was an accident - I ran into a accident scene. It wasn't pretty at all, and I really hope the rider made it through. This reminds me shit could happen any time to any of us...
Sunday, September 26, 2010
Weekday solo ride to Point Reyes Station
 |
| A nice tourist took this picture for me! Thanks! |
 |
| Chilling at the bottom of the hairpin turn |
Subscribe to:
Posts (Atom)

 Posts
Posts


